Emptying trash files on Android devices helps bid farewell to unnecessary unwanted files.
Deleting a file on Android doesn’t mean it’s gone forever, as it gets stored in the trash folder just like on a computer. To permanently remove unwanted files from your device, follow these steps for emptying the trash.
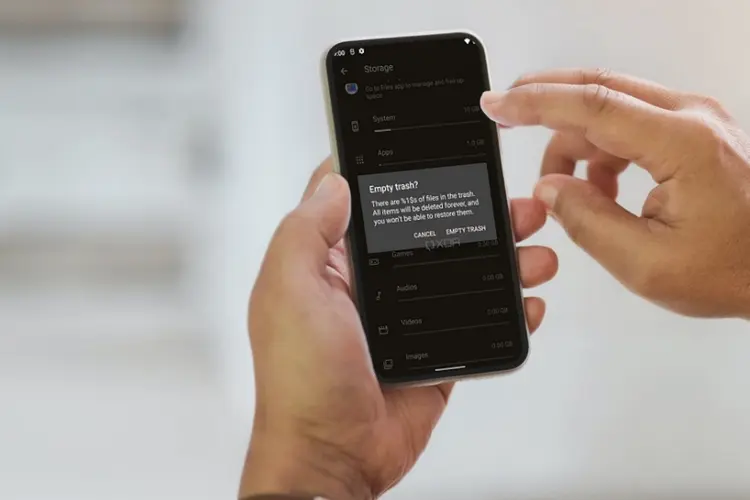
Samsung My Files
Instead of Files by Google, Samsung devices have the My Files app from Samsung. While its interface may differ, clearing out unwanted files in this application is a simple task.
Access the app through your device’s application drawer and execute these steps:
- Navigate to the very bottom of the initial page and select Trash by tapping on it.
- To clear all items in the trash folder, tap on Empty located at the top-right corner represented by three dots.
- You can opt to select unwanted files by tapping Edit, and then tap the Delete button located on the bottom-right corner.
You can install Files by Google on a Samsung phone and follow the aforementioned steps.
However, it’s important to note that the trash folder is not synchronized between these two applications. This means any files you delete using My Files won’t appear in your deleted items list within Files by Google, despite all other files being accessible through both apps.
Files by Google
To access the “Files” app on a Google Pixel phone or any Android device with an unmodified version of the operating system, simply swipe up from your Home screen.
Once you have opened the app drawer, locate and tap on “Files.” Although its full name is Files by Google, it will appear shortened in your list of apps.
Here’s what you do within Files:
- To access the Trash, tap on the hamburger icon located at the top-left corner and select it from the sidebar.
- You can either select specific items to delete by tapping on them or choose the option “All Items” at the top.
- Click on the Delete option located in the lower-right corner. Once a confirmation window pops up, click on Delete once more to confirm.
Your files are permanently lost now. However, if you frequently delete files to keep them confidential, then consider utilizing Files by Google as a safeguard for your data.
Google Photos
Directly within the Google Photos app, you can retrieve images that have been deleted in case you utilize it as a means of managing your smartphone’s photos.
- Click on the Library option located in the menu at the bottom, then tap on Trash.
- Select the “Empty trash” option by tapping on the three dots located in the upper right corner.
- You can also press Select, pick out individual photos, and thereafter hit Delete.
If you erase your pictures from Google Photos, they will be accessible in the trash file of Files by Google. Therefore, deleting them from there means that opening Google Photos isn’t necessary.
Nevertheless, remember that if you store your photos right into your account on Google, only through their platform can you delete them permanently.
Previously Deleted Files
For those who heavily rely on Google, the majority of their activities are not carried out directly on their phones; rather they are saved in the cloud.
To access this information, it is necessary to reach and use the relevant app’s trash folder.
Beginning with the Google Drive app is a wise choice, as it permits access to the trash folder through its sidebar.
The position of the trash is consistent across Google’s cloud-based applications as the user interface remains identical whether you access Google Docs or Sheets.
Conclusion
You now know to clear out your Android device’s trash folder, regardless if it’s a Google Pixel or Samsung Galaxy phone.
Don’t forget to check this folder regularly and delete unnecessary files that consume valuable storage space.
When Emptying Trash files on Android or unwanted files from your Android device, follow these steps:
- Samsung My Files app: Access the app through the app drawer and tap on Trash.
- Files by Google app: Access the “Files” app on a Google Pixel phone or any Android device with an unmodified version of the operating system.
- Google Photos app: Access the Library option, tap on Trash, and select the “Empty trash” option.
- Select, pick out individual photos, and hit Delete.
- Google Drive app: Access the trash folder through its sidebar.
Note that the trash folder is not synchronized between these two applications, so any files deleted using My Files won’t appear in your deleted items list within Files by Google.
If you store your photos directly on Google’s platform, only through their platform can you delete them permanently.
For those who heavily rely on Google, accessing the cloud-based applications’ trash folder is necessary.
