Do you know you can enhance video recordings on iPhone? Yes! Once you master these settings, your iPhone videos will appear even better.
Although your iPhone can produce impressive videos by default, fine-tuning certain camera configurations can yield even superior outcomes.
If you’re just starting or an expert in photography, below are the iPhone camera configurations to adjust instantly.
Modify your video’s frame rate and resolution
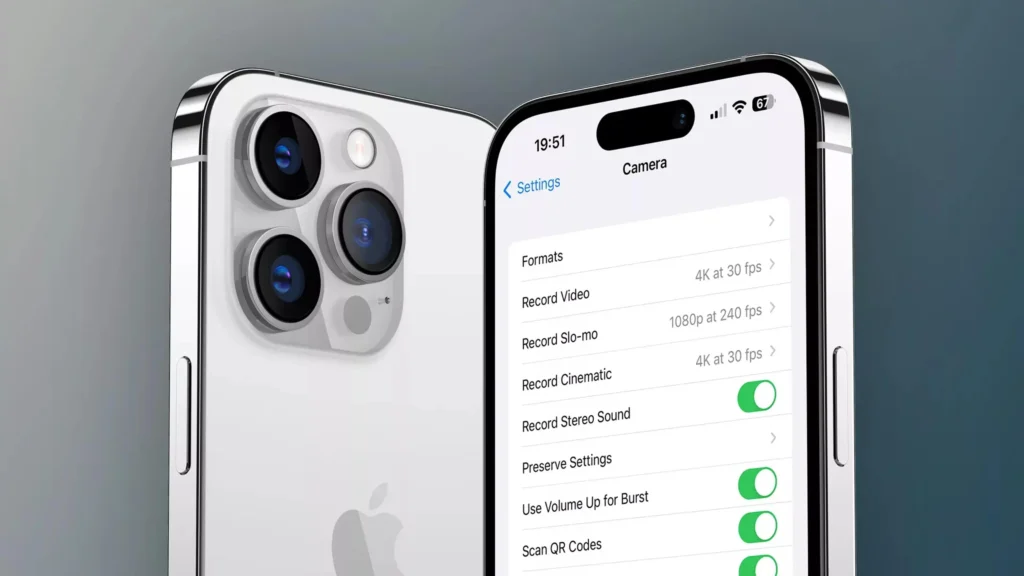
Navigate to the Camera > Record Video option in your iPhone’s Settings app.
The subsequent display presents various options for video quality and frame rates. Select 4K at 60FPS if you prefer to capture footage in the maximum resolution available.
It’s important to note that selecting a higher resolution will increase the storage requirements for each video. Additionally, you have control over adjusting slo-mo and cinematic video resolutions.
Therefore, it is advisable to modify the resolution settings of frequently used video modes.
Directly from the Camera app, you have the option to modify both video resolution and frame rate. Firstly, toggle over to Video mode.
Then select either HD or 4K in the top-right corner of your screen to change your preferred resolution accordingly. To regulate the frame rate setting, simply tap on its adjacent FPS value field as needed.
In-Camera> Record Video, you will also discover an Auto FPS feature that automatically adjusts the frame rate to 24FPS for enhanced low-light video quality.
This setting is initially enabled for only 30FPS videos; however, it can be activated for both 30 and 60fps shots at your preference.
Make sure you enable Enhanced Stabilization
As you undertake that task, we also suggest activating Enhanced Stabilization.
The iPhone 14, iPhone 14 Pro, and newer models offer Enhanced Stabilization just like Action Mode. This feature slightly crops the edges of your footage and zooms in a bit.
However, it differs from Action mode as this works with Cinematic mode too.
Although Enhanced Stabilization is enabled by default, you might have accidentally turned it off while adjusting your settings.
To ensure that it’s activated, go to Settings > Camera > Record Video and toggle the option for Enhanced Stabilization.
Activate the Grid and Level Tools
To achieve a well-proportioned composition in photography, the rule of thirds recommends splitting your image into nine equivalent sections with two vertical and horizontal lines.
You can then position your primary subjects or focal points at these lines’ intersections to obtain balance.
If you’re an expert or novice in making videos, utilizing camera gridlines can assist you in effortlessly applying the rule of thirds.
Setting up Grid Lines on iPhone is a straightforward process; navigate to Settings > Camera and turn on the switch neighboring Composition for access to it.
In addition, in iOS 17 Apple unveiled a leveling feature that assists in aligning your shots on your iPhone.
Activate the Level function by enabling the switch adjacent to it under Settings > Camera within your device’s Camera application.
Turn off HDR video
The iPhone 12 and newer models are set to utilize Dolby Vision HDR (High Dynamic Range) as the standard option under ideal conditions.
Nevertheless, enabling the HDR mode can make videos appear distorted or excessively vivid if they do not meet optimal video conditions.
If you prefer a natural feel for your videos and want to maintain color consistency, it’s best to turn off HDR.
To do so, simply navigate to Settings > Camera > Record Video and switch off the toggle next to HDR Video.
The Macro Control must be enabled
Modern iPhones boast an admirable feature known as Macro Control that enables users to capture exceptional shots of objects just two centimeters away.
Regrettably, only the iPhone 13 Pro and later Pro models have access to Macro Control. Therefore, if you want to capture close-up shots, navigate to Settings > Camera and make sure that Macro Control is enabled.
- Firstly, launch the Camera app and move your iPhone’s camera near the object.
- After doing so, the ultra-wide lens will instantly activate on your phone’s camera.
- Furthermore, when Macro Control is enabled you’ll see a yellow flower icon as well.
- To turn off automatic macro switching simply tap this floral symbol.
Although the iPhone’s camera is capable of recording detail-packed videos without any effort from you, adjusting its settings can enhance your footage quality.
This becomes even more crucial during challenging shooting scenarios to obtain outstanding results.
ProRes from Apple should be utilized
Enabling ProRes mode is advisable for those who own an iPhone 13 Pro or a newer model and desire to capture highly detailed clips using their Apple device.
The Apple ProRes format is designed for “visually lossless” recording, making it notably more convenient to edit.
Although this aspect may be irrelevant if you’re only creating videos for Instagram or TikTok, it becomes highly advantageous as a cinematographer or aspiring YouTube content creator.
To activate ProRes, navigate to Settings > Camera > Formats and flip the switch adjacent to Apple ProRes in the Video Capture section.
Access the Camera app on your iPhone and select Video mode.
Next, tap the ProRes option located at the top.
Be aware that although this format provides higher-quality video recording capabilities with more detail captured in each shot,
It also generates files up to 30 times larger than those created using HEVC (High-Efficiency Video Coding).
As such, ensure you have sufficient storage space available on your device before choosing to utilize ProRes recordings.
Switch to Action Mode
To enhance your video recordings on iPhone you have to switch to action mode.
Realizing that your hands were shaking while recording a video of your favorite artist performing can be an awful feeling.
This is why the Action mode feature on iPhones 14 and above has become essential.
It is specifically designed to minimize any shakiness in videos, making it easier for you to get perfect footage every time.
To activate Action mode, open the Camera app on your iPhone and switch to Video mode.
Look for an icon resembling a running person labeled as Action Mode. Tapping this will turn it yellow while displaying an Action mode banner at the top of the screen.
For optimum output in Action mode, it is advisable to be present in a brightly lit area; otherwise, you may receive an on-screen message saying “Additional light required.”
To activate this function for dimly lit situations, navigate to Settings > Camera > Record Video and flip the toggle adjacent to Action Mode Lower Light.
Conclusion
Do you know you can enhance video recordings on iPhone? Yes! Once you master these settings, your iPhone videos will appear even better.
To improve iPhone video quality, adjust the camera configurations as follows, Adjust the video’s frame rate and resolution. Select 4K at 60FPS for maximum resolution.
Adjust the frame rate settings for frequently used video modes. Enable Enhanced Stabilization for better cropping and zooming.
Activate Grid and Level Tools for well-proportioned composition. Set up Grid Lines and Level in Settings > Camera.
Turn off HDR video for a natural feel and maintain color consistency. Enable Macro Control for close-up shots. These adjustments can significantly enhance iPhone video quality.
